


INSTALLING 3000 WATT MOTOR INTO RX
Here’s a walk through of how we installed a NB Power Motors 3000 Watt 190mm motor into an RX. Your own build can be different, obviously. We used a custom enclosure made by Moto Electric Racing's shop for the RX. You can order this enclosure from us with your choice of color.
- Remove stock wheel and motor. Shim the brake. We put a rubber cap on the exposed power connection connected to the old system to seal it against water. With the old motor gone, we don’t really need the old battery. An option we considered was ditching the stock battery and building a long seat to fill the space. We decided to keep it to run a headlight and preserve the look.
- Modify the drop-in tabs and fork mount. The axle for the new motor is a few millimeters larger in diameter. We had to remove the excess material to widen the holes int he drop out tabs and one side of the fork on the RX. We highly recommend asking a machine shop to do this. It’s a very small amount of enlarging, but you need the job done right. The picture shows a washer from the 190mm kit - that is the diameter of the axle. The drop out tab below the washer needs to be made this wide.


- Install tire on the 20 x 4 wheel. We went with the Vee Apache Slicks.
- Install the new motor and wheel assembly. Point the power cord towards the inside of the bike where the battery will be.
- Install the custom enclosure. This enclosure fits tightly. We needed to use a plastic shim to lift one tab and gentle the beast in place, lightly tapping with a rubber mallet. Once in, it is a very secure and solid place to mount the battery and controller. The slots shown are for velcro straps to secure the battery in place.
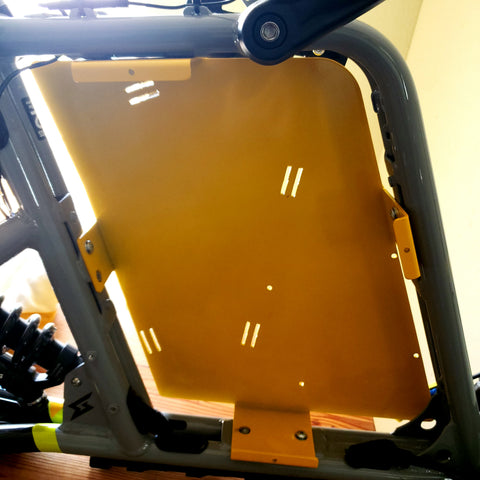
- Install the Battery and Controller. We trimmed down the corners of the controller, leaving the screw mount holes. This allows a perfectly-tailored fit.


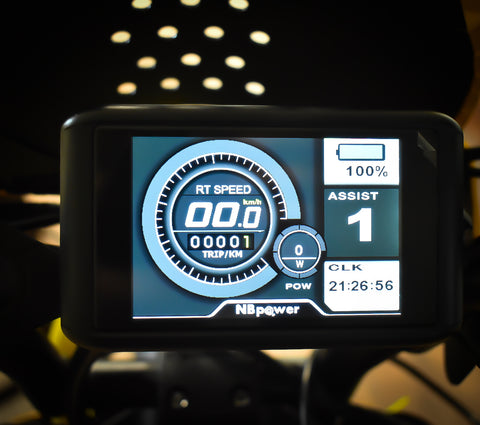
- Mount the LCD display and the on/off controller switch.

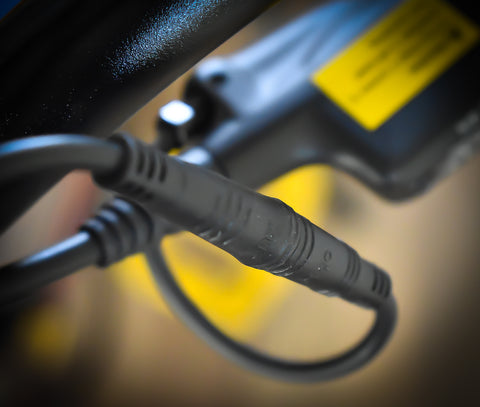
- Connect wires. The NB Power kit is color coded and easy to understand what plugs into what.

- Organize wires. We used the zip tie loops on the bike to route the main power cord from the motor to the battery. See picture. We used Techflex wire sleeving to help organize the controller wires going up to the LCD controller display.


- Connect brakes. Most electric bike systems will not operate without a signal saying that the brakes are connected. Happily, the Super73 brake connectors are currently compatible with the NB Power’s Sabvoton controller. That means we could just plug the Super73 stock hydraulic brakes in to the new controller harness.
- Because we decided we want to use the stock battery, we needed to have brakes plugged in to it. We used the brakes from the NB Power kit to tell the system it has brakes, and we stowed those brake levers inside the enclosure. This was our cheap work around, but it works.

- Charge the 72 v battery. The supplied charger automatically stops when the battery is fully charged. Never leave a charging lithium battery unattended.
- Close the enclosure.

- Install a twist throttle.
- Power the system on. You will see that the LCD display shows the default parameter settings. Using the +/- keys on the power on module, you can change the settings from 1 to 5. For testing purposes, leave it on setting #1.
- SAFETY STEP. Before activating the motor, check that the the nuts on the axle are secure and tight. Check that the wheel tabs are tight. Check for any unwanted movement in the tire (side to side or sliding). Check that your brakes are working properly. Make sure that all wires are fastened properly and that there his nothing that may get caught in the rotating wheels. Raise the rear tire off the ground - use a friend if possible. Test the motor at low power. Stop the motor with the rear brake and verify that the brake is functioning properly.
- SAFETY STEP. Before your first test ride, perform an all around safety check. Make sure that your handlebars are tight. Wear protective gear when using this motor. Armor, pads, gloves with knuckle protection and full-face protection helmet.
Not covered here are a host of little details that go into any build. The Sabvoton controller is programmable using a downloaded application, but so far, we've found the stock settings provide plenty. Find the App in Itunes or Android stores as: "MQCON"
A lights and brakes add-on will be available in late February. Contact support@custom-ebike.com to pre-order.
Nikolas Guitron
Hi would I be able to use my stock battery to extend the range on this kit?